Friday, July 31, 2015

A Double Dose of Sweetness Comes to Bainbridge


Sweetlife Farm has a Tipi you can sleep in!  And if that isn’t enough to make your heart go pitty-pat . . . we now have REAL bagels on Bainbridge.  And chocolate or almond croissants you can hear.  And cinnamon-laced, orange zest-flecked spirals of heaven on earth called Nice Buns.   Best.  Summer.  Ever.
First, the Tipi. 

Travel up a one-lane gravel road buffeted by fir and cedar, turn onto a winding drive, and suddenly the view astonishes.  Welcome to Sweetlife Farm, home of Bob and Nancy Fortner, where the living (and visiting) is very sweet indeed.  Ten picturesque wooded acres, a pond with an abundance of frogs, bee hives for honey, gardens galore, impossibly adorable dogs, and a comfortably appointed Tipi guesthouse. 

Sweetlife Farm is a place of tranquility, where nature is nurtured, art abounds, and quiet reigns.  If you live in the Pacific Northwest, sneak away and spend a couple of nights here.  Out-of-town guests definitely should stay here.  Tipi + Fortners' Breakfast = Bliss.  
The Tipi is available for two-night stays through AirBnB.
Spanky, One Impossibly Adorable Dog

Now, one and all, rise and shine, and welcome Coquette Bake Shop.


I feel like a stalker.  Or an addict.  Maybe both.  Oh look, it’s 8:00am.  I’m sure I need something in Winslow.  Anything to make possible a stop at Coquette on Winslow Mall.  If the obsession doesn’t wane, Phil and I are going to waddle by autumn. 
Let it be known that I love all our local bakeries.  Each has something that brings me back again and again.  Helen’s rolls at Blackbird Bakery.  Peanut butter and jam pullaparts at Bainbridge Bakers as recovery food after a hard swim. Cold brew coffee with raw sugar simple syrup at The Marketplace at Pleasant Beach.  Fresh roasted beans at Pegasus.  A potent and delicious latte at Roosters Cafe. Our daily bread and the occasional dark chocolate brownie at Pane D’Amore. 
But the new kid on the block has serious cred.  
The French will tell you that a good croissant speaks to you.  I get it now.  Hold a Coquette croissant to your ear, gently squeeze, and the crust shatters in a cascading symphony.  It whispers butter with every bite.

Then there’s the bagels. 
If you spend any time on the east coast, you have an opinion on good bagels.  For me, it's gotta be The Bagel Hole in Brooklyn, served at Russ & Daughters with the world’s best smoked fish. Pre-Coquette, my feeling was west coast bagels were better used as flotation devices. But no more. The crust of a Coquette bagel crackles, and fights you just enough before yielding to an interior with the right amount of chew. 
If you’re in town after 10:30am, Coquette also has a variety of sandwiches on their own fresh-baked baguettes. 

What makes Coquette special is the combination of impeccable ingredients, spot-on technique, and attention to the smallest detail.  The packaging is simple, clean, and bright.  Dark chocolate in the croissants is just the right amount of gooey, and barely sweet.  The Nice Buns have a perfectly browned crisp crust, a soft yet substantial crumb, a hint of orange zest, and a sprinkling of sugar.  

The ice cubes in their herbal tea are made from the tea itself, so your drink never waters down.  See what I mean?  They’ve thought of it all.
C’est tres bon, n’est pas?
 
Coquette is open Wed - Sun from 8:00am to 4:00pm
Wed, Thurs, Fri, and Sunday they're in Winslow Mall
Saturday they're at Farmer's Market in the morning, then Winslow Mall in the afternoon

P.S.  Coquette bagels keep for a day, if left in paper and then wrapped in plastic.  The next day you can, you will, make fabulous bagel and egg sandwiches.  

Wednesday, July 8, 2015

Market Watch: What To Buy the Week of July 11th

Treasure from Persephone, Laughing Crow, and Hey Day Farms
Last Saturday was the 4th of July so there was no Farmer's Market. When this dawned on me earlier in the week, I plotzed.  With dishes promised for three parties, and out of town guests staying for the holiday, it was time to mobilize. First, take stock: Day Road Farm Stand open. Butler Green Farms CSA open Tuesday. Hey Day Farm Store open. But more will be needed. Fortunately Rebecca Slattery of Persephone Farm and Robin Bodony of Laughing Crow Farm came to my rescue.

My approach to planning meals is opposite the norm. Rather than deciding what I'm going to cook, and then hunting down ingredients, I load up on whatever is peaking and then build meals around it.  

Three things are looking particularly good right now: cauliflower, potatoes, and zucchini blossoms.

Before long we will be overloaded with zucchini, but right now there be zucchini blossoms! The color of the sun, delicate, and versatile, they make their way into salads and sauces. Commonly they are stuffed with cheese and herbs, fried or baked, and then topped with a sauce. I've done this many times, with queso fresco and tomatillos, or fresh mozzarella and smoked peppers.  

But, given the 90-degree temperatures, I wanted something cool and fresh. Since I was going to a sushi party, I veered off to Asia. I julienned snap peas, cucumber, purple carrot, and green onions, and minced cilantro and shiso leaves and tossed it all in a bowl. I cut thin slivers of avocado for a little richness and to hold it together.
Filling Persephone Farms Zucchini Blossoms With Goodness

For a nice dressing: put 1/8 cup each soy sauce, rice wine vinegar, and canola oil in a half-pint mason jar.  Add a tablespoon of sesame oil, 1/2 teaspoon mustard, a few grinds of black pepper, and a pinch of crushed red pepper.  Peel a clove of garlic, smash it with the side of a knife and add it to the jar, along with three slivers of fresh ginger.  Screw on the lid, shake like crazy to blend, and refrigerate until ready to use.  (This dressing is also awesome with pot stickers, spring rolls, on a cold noodle salad, or drizzled on grilled salmon or chicken.)

To assemble, gently spread the leaves of the blossom and stuff in the vegetable mixture. Add an avocado slice, and drizzle about a teaspoon of dressing inside. (Discard the pieces of garlic and ginger.) Twist the petal tops together to seal, arrange on a plate and drizzle with more dressing.  Sprinkle with sesame seeds if desired. Serve immediately.  
Stuffed Fresh Zucchini Blossoms with Edible Flowers and Shiso Leaves for Garnish
Unexpected, Fresh, and Delicious

Summer means burgers in our house (see post below) and burgers demand homemade potato chips. If you want a great chip, you need a great potato, and Laughing Crow Farm has extraordinary potatoes.  For my chip I chose their Purple Caribe.  It's nice and starchy, with snowy white flesh.  I've also made stunning chips with their all-blue, merlot, snowflake, or yukon gold potatoes.

Here's the recipe I use for potato chips with one change.  I keep the oil at 350 degrees so the potato slices cook quickly and evenly without fussing over turning them.  Just move them around a bit after you've added them to the oil.  The 30-minute soak in vinegar water is key to crisp chips.
You can slice the potatoes thin with a knife, but a mandoline will do the job quickly and produce even slices.  I have an inexpensive knockoff and it works great.


Don't crowd the potatoes, and watch them closely as they cook, as they will quickly go from golden beauties to chip charcoal.
  Potatoes, Oil, Salt.  A tasty triptych.

What else does the 4th of July call for?  Potato salad.  Well, potatoes in a salad anyway. A couple of weeks ago I made a fairly traditional version, with a buttermilk/sour cream/mayo combo base, hard-boiled eggs, garlic scapes, spring onion, capers, baby carrots, purslane, and lots of herbs.  

This time I wanted to incorporate more vegetables, and take advantage of the abundance of cauliflower.  What better way than with cauliflower candy?  
Break or cut cauliflower into 2 - 3 inch chunks.  Drizzle with olive oil to coat, sprinkle with salt and pepper.  Roast in 400 degree oven until very well browned, with some spots of char, about 20 minutes.  Done.

On to the potatoes. The easiest way to get a crispy texture and toasty flavor is chunk up potatoes, put them on a cookie sheet, toss with olive oil to coat, sprinkle on salt and pepper, and roast them in a 400 degree oven. Pop them in when you take the cauliflower out for about 20 minutes, until they are crusty outside and soft inside. If you don't mind an extra step, zap the potato chunks in the microwave until barely tender, then coat with olive oil, salt and pepper, and then grill them until they have a nice crust. More work, but also more flavor.    

The rest of the salad ingredients are up to you.  What veggies you like, what's looking good. How much chopping you want to do.  I like lots of color, so here's what I went with.  

Chunk up green and yellow summer squash, toss with olive oil, salt and pepper and roast as with the potatoes above, or grill until just softened and grill-marked.

Sliver green and yellow beans, halve orange cherry tomatoes, and chop parsley.
Recruit good friend like Debbie to sliver beans. 

For even more color and variety, I added two cups of cooked black barley.  

Then I whipped up one of my favorite dressings: a lemon-tahini vinaigrette.  If you were one of the 200 or so folks who attended the Arms Around Bainbridge Bingo Night Fundraiser last January, this is the dressing I used on the freekeh salad.  It is incredibly versatile, complimenting meat, fish, grains, and greens, as well as potatoes and cauliflower.  And it's so simple.

Lemon-Tahini Vinaigrette
1 garlic clove, minced
1/4 cup fresh lemon juice,  plus zest from lemons
1/4 cup olive oil
2 tablespoons tahini
1 teaspoon pure maple syrup (more to taste)
salt and pepper

Combine all ingredients in bowl.  Whisk to combine.  Dressing keeps 5 days, covered in fridge.

Just before serving, toss everything together with enough dressing to coat, garnish with pea shoots if you got 'em, and serve.  
Thank you farmers!

The Burgers on Burgers and Buns

No Cheeseburgers in this Paradise
I was in Florida a couple of months ago, and after eating just-off-the-boat fish for three days I was ready for a change of pace. Sipping a St. Germain margarita at a Tiki Hut, I turned to my bartender for a recommendation for a good burger. Get to know your bartender and you will eat well, my friends.  So I should have listened to him when he said what I had in mind was not to be found. Still, I really wanted a burger. 

I settled for a local place that looked promising.  Opening the menu I found: Our Beef Burger stands alone. Alas, it did not.  Continuing on: Smothered with creamy boursin, caramelized onions, portabella mushrooms, topped with truffled Asian slaw, on a Brioche bun. I could also try: Hand-pattied beef stuffed with bleu cheese, topped with fried egg, onion rings, and smoked bacon, all drenched in jalapeno queso.


Roundly rejecting a recommendation from my effervescent server for a burger involving mango-pineapple topping and hoisin lychee BBQ sauce, I plead for something not stuffed, smothered, and drenched beyond recognition. Just beef seasoned with salt and pepper, grilled medium-rare, with tomato and a little arugula on the side. 


Sadly, without the culinary train wreck of toppings to hide under, the dense, greasy (rather than juicy) meat puck tasted of nothing, really, and was dwarfed by a spongy, over-sized bun. 

We can do better. Collectively, let's all do better. Walk with me.


If you've been reading my posts the past couple of months you know that I believe in quality over quantity, that paying the lowest price for food does not equate to the greatest value, and that delicious meals come from fresh, local ingredients, simply but thoughtfully prepared. The humble burger and bun are no exception.


Part 1:  The Burger

If you buy pre-ground beef, seek out local, grass-fed beef from a farmer or full-service butcher that sources whole animals and grinds their own beef. They should be able to tell you the cut of meat and the percentage of fat.  Fat = flavor and you want about 20% of it in your burger. Buy fresh ground, not frozen.  And if you want the very best -- which of course you do -- grind your own just before grilling. If you have a stand mixer, a grinder attachment is a worthwhile investment, and easy to use.  


Start with well-marbled chuck roast


4.5 pound chuck roast from Rainshadow Meats

Slice in 2-inch strips or chunks, place in a large bowl, sprinkle with 1 teaspoon of sea salt per pound, toss to evenly coat, cover and refrigerate 24 hours.

Chill grinder, blade, and large-hole plate in freezer for at least 10 minutes before using. You want everything cold for the best grind.


Run the strips of beef through the grinder


Grind a second time for this meaty marvel
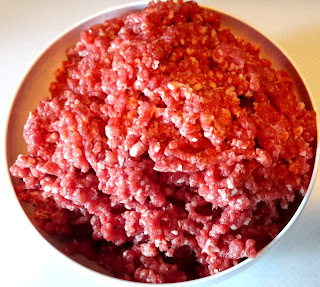
Notice the large grind, and bright red color, flecked with creamy white fat 

Gently form burgers, pressing only until they are cohesive. The objective is to make a burger compact enough to hold together on the grill without creating a dense mass. Phil and I like a 6-ounce burger that is about 1-1/2 inches thick, grilled medium-rare.


Part 2:  The Bun


Buns can be dense, dry, eggy, squishy, crumbly, tasteless, way too large, fake tasting from dough stabilizers and preservatives, or just all-around wrong. Save foccacia for another day. Brioche and meat should never meet. Panini buns are too large and have too little flavor. Consistently disappointed I took matters into my own hands.  Borrowing piecemeal, I came up with my own recipe.  A combination of unbleached white flour and whole wheat flour give structure and just enough wheaty flavor to prevent boredom. Potato flour provides a soft, yielding quality. Buttermilk adds a bit of tang. Butter contributes richness. Because I like the marriage of beef and fresh rosemary, I minced a little and kneaded it in, but you don't have to. Because I like a little crunch and contrast, I sprinkled on black sesame seeds, but you don't have to do that either.   

Size matters
A 3.4 ounce roll is the mate to a 6 ounce burger

Flatten dough balls with the palms of your hands
Brush risen rolls with beaten egg, 
sprinkle with coarse sea salt and sesame seeds, if you like.

The aroma of bread baking is one of life's great pleasures. 
Nice buns, eh?

Part 3: Burger Meets Bun

While the burgers are grilling, split the rolls and drizzle on a tiny bit of olive oil. If you like cheese on your burger, add it during the last minute of grilling. I implore you to not jump the shark when it comes to cheese. Choose one that compliments rather than covers up the taste of your burger, like a nice sharp cheddar, pepper jack, or manchego. Stilton, Gorgonzola, goat cheese, truffled yak's milk cheese are beautiful and delicious, but they're overkill.   

While the burgers REST FOR 7 MINUTES (yes, I'm shouting again because you have to do this) lightly toast the cut sides of the buns on the grill. 

Toppings? Again, less is more.  I prefer to eat greens and tomatoes on the side rather than on top of my burger where they get warm and limp. I will concede that a couple of small strips of good bacon can be a beautiful thing. Dijon mustard or good mayo have their place on the bun. I don't care for ketchup, but if you do, please make your own. I top my burger with homemade Worcestershire Sauce, which is so easy to make and so delicious I've had guests ask if they could slurp some from a spoon.  

If you read the post above, you'll have some homemade potato chips handy to go with your burger.  

A Bainbridge Burger's Burger

Heather's Buttermilk Potato Burger Buns

1.5 tablespoons active dry yeast
2 tablespoons honey
1.5 cups warm water
3/4 cup buttermilk, room temperature
4 tablespoons butter, melted
1 tablespoon sea salt
1 cup Shepherd's Grain whole wheat flour
1/2 cup Bob's Red Mill potato flour
4 cups Shepherd's Grain unbleached all-purpose flour

1, 4-inch sprig fresh rosemary, leaves minced
1 egg, whisked with 1 tablespoon water
Sesame seeds and/or flaky sea salt (optional)

Whisk water, yeast, and honey in small bowl until combined.  Let stand until bubbly, about 10 minutes.

Whisk buttermilk, melted butter, and salt in bowl of stand mixer to combine. Add wheat flour and whisk again. Add yeast mixture, minced rosemary, potato flour and 2 cups of all-purpose flour to mixing bowl. Attach dough hook and mix on low speed until dough starts to come together, about 4 minutes. Add remaining all-purpose flour by 1/2-cups.  You may not need all of the flour. Stop adding flour when dough clears the side of the bowl, and is smooth, soft, and no longer sticky. While dough is mixing, use butter or olive oil and coat the inside of a large bowl. Transfer dough to bowl, turn once to fully coat, cover with plastic wrap or a damp, clean kitchen towel. Let dough rise in a warm place until doubled, about 45 minutes to 1 hour. 

Line 2 large baking sheets with parchment.

Gently deflate dough and turn out onto a lightly floured surface. Divide dough into 14 equal pieces. (Optional: For perfectly equal sized buns, lightly flour digital scale. Weigh dough.  Divide weight of dough by 14.  Portion each dough piece to that weight.)

Form each portion of dough into a tight ball and transfer to baking sheets, leaving 2 inches between each ball. Let stand 5 minutes. Lightly flour the palm of your hand, and using gentle but firm pressure, press down on the dough balls to form rounds that are approximately 3/4-inch thick and 4 inches diameter. Cover buns with plastic wrap, but do not press down or seal edges.  Let rise in a warm place until doubled in bulk, approximately 35 minutes.

While buns rise, preheat oven to 375°. Whisk egg with 1 tablespoon water to fully combine.

When buns have risen, gently remove plastic wrap. Using a pastry brush, gently brush each bun with egg mixture to fully cover tops and sides. Sprinkle on coarse sea salt and/or sesame seeds, if using. 

Bake buns in preheated oven for 20 - 25 minutes until lightly browned. Remove from oven and transfer to a wire rack to fully cool.

Buns are best eaten the day they are baked, but will keep 1 - 2 days in a paper bag, placed in a plastic bag.  


Wednesday, June 24, 2015

Steak Night

Burk Ridge Farms, Whatcom County 100% Grass Fed Porterhouse
From Rainshadow Meats, Pioneer Square
Phil rode his bike home from work last Saturday.  He had a couple of hours to put in at the office, and it was a glorious, sunny day.  He could ride the ferry across the Sound, and peddle a few miles home, but that’s what mortals do.  Phil takes the overland route via Redmond, Tacoma, Gorst, Bremerton, Silverdale, and Poulsbo for a 100+ miles in the saddle.  If past is prologue, he will arrive just in time for cocktails, legs speckled in chain grease and road dirt (which is sexier than it sounds), claim he didn’t really exert himself (which is just as annoying as it sounds), and then proclaim he is starving.  Ah. For this I have a plan.  It involves steak.  Really, really good steak.
Let’s take a step back here and talk about meat. 
We’d rather have a brilliant, locally sourced, dry-aged, 100% grass-fed steak every couple of months, than something mediocre more often. Lucky for all of us, there are great local places to buy meat.  There are small farms where, if you like, you can shake the hand of the rancher and observe the animals that will one day become your dinner, like Seabreeze Farm on Vashon Island, Shorts Family Farm in Chumacum, or Hey Day Farms on Bainbridge Island.  
SeaBreeze Farm, Vashon Island Uber Dry-Aged Porterhouse
There are also full-service artisan butcher shops sourcing whole local animals, using the nose-to-tail philosophy, so that no part of the animal is wasted, like The Swinery and Rainshadow Meats. 
 Boneless Strip, Harlow Cattle Company, Spanaway, Washington 

We frequently shop at Rainshadow Meats. In addition to beef, pork, chicken, and occasionally duck, goose, turkey, and rabbit, they smoke bacon, make sausages, pate, killer meatballs, duck confit, and more.

Back to tonight's steak.  The butcher cut a steak to Phil’s specifications.  Whether it’s a côte de boeuf, strip steak, or porterhouse, Phil wants it 1-3/4 inches thick.  Why?  Because we like it that way.  One of many great things about having a relationship with a local butcher is that you get what you like, not what’s been mass-packaged, squished between Styrofoam and shrink wrap. That’s no way to splurge.

As soon as you get home with your precious bundle of meaty goodness, sprinkle 1 teaspoon sea salt per pound evenly over both sides of the steak.  Cover and refrigerate at least an hour, and preferably 24 hours.

Côte de Boeuf, Strawberry Mountain Farm, John Day, Oregon 


You can pan-fry, broil, or even deep fry a steak, marinate it, coat it in a rub, etc., but why would you?  You’ve just paid upwards of $60 for about 2-1/2 pounds of exceptional beef.  Don't you want to taste it? I’m in bed with the Tuscans on steak prep.  Bistecca alla Fiorentina.  
Wait, something is missing.  A drink!  It's summer.  The sun is shining.  Let's make daiquiris.


Daiquiri Rebelde
1/2 oz fresh lime juice
1/2 oz simple syrup (1:1 raw sugar to water)
2 - 3 fresh mint leaves, plus 1 for garnish
3 oz Bull Run Distiller's Pacific White Rum
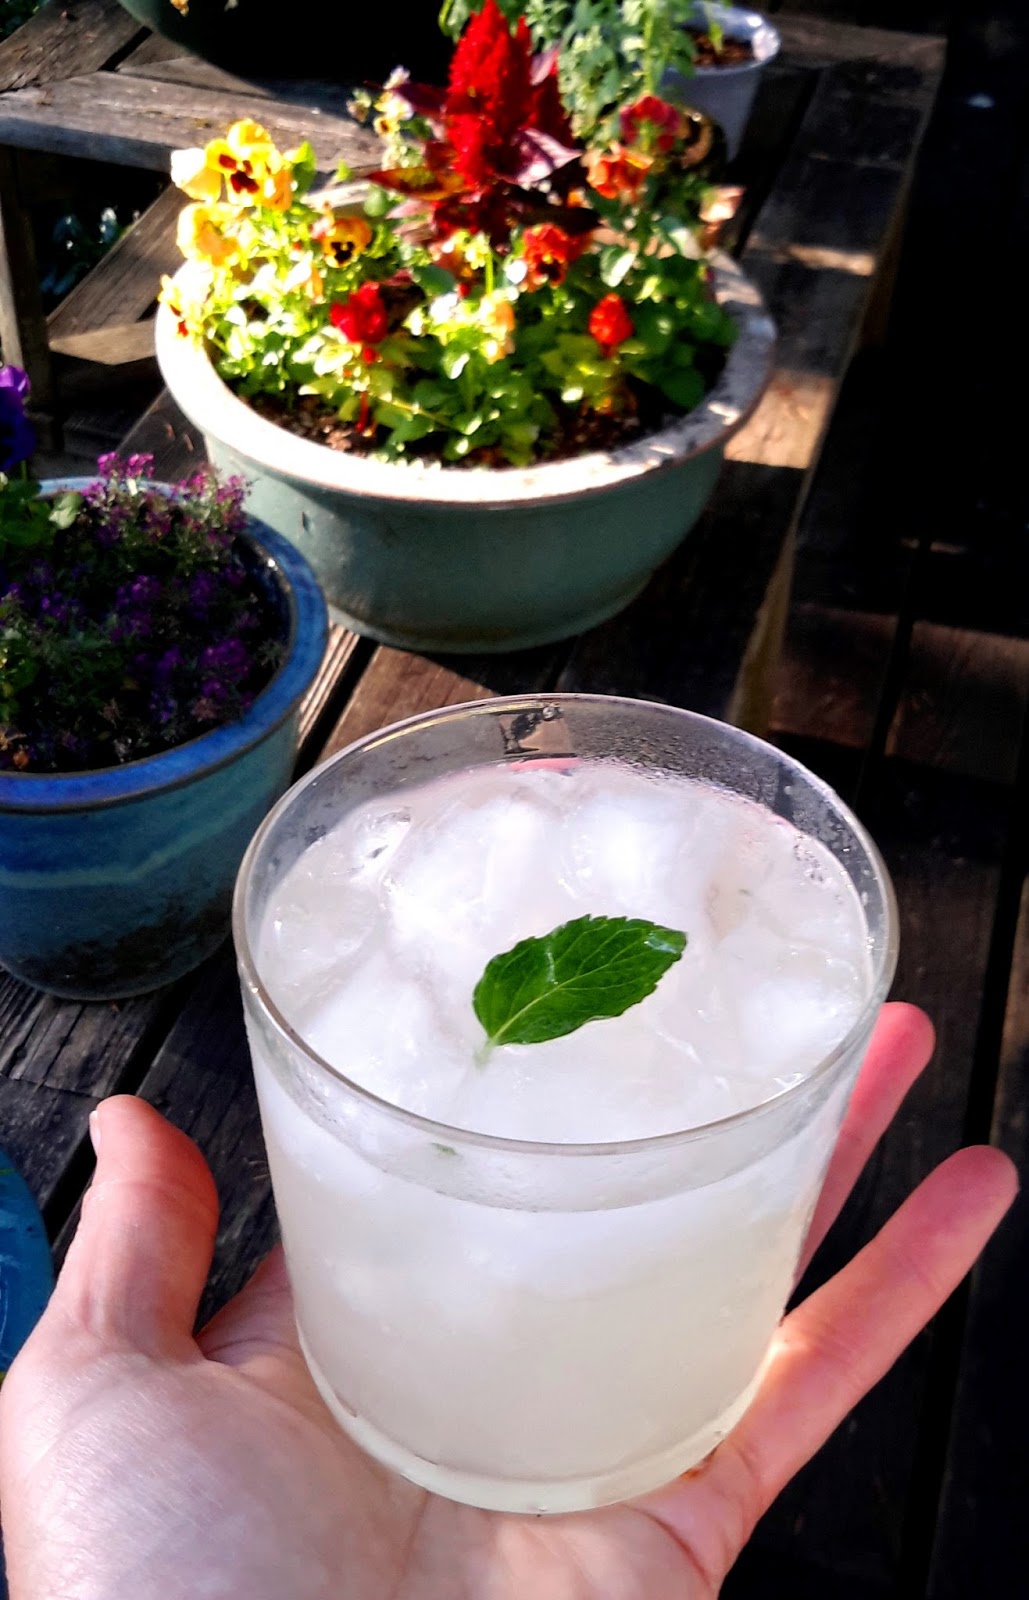
Combine all ingredients in shaker with ice, shake and strain into chilled cocktail glass, up or on the rocks. Garnish with mint leaf.
Drink me now. 


On to cooking.  I turn you over to Phil.  Grill man, take it away . . . 
Refer to Heather's previous post on smoking chicken for how to prepare a gas grill. 

To sum up: soak some chips (I like mesquite for steak) for half hour beforehand. Wrap chips in foil, poke a few holes in foil. Fire up the gas grill. If you've got the time, talent, and inclination, use charcoal. I have none of the above. 

When grill is good ‘n’ hot, add chips.  When wood is smoking, slap that steak on the heat. I did this steak for four minutes each side. Then transfer to cool side of the grill (i.e., turn off all burners but one and move the steak over there). Grill five minutes more each side. If you like a hint of rosemary, as the Tuscans do, take a generous sprig, dip it in olive oil, and brush the steak before each turn.

I know there are professionals who say turn only once and never fuss over the meat. I envy those people. They are people who have staff to start their Argentine bonfire and who remain conveniently off-camera so you don’t know how much work or time is involved. But I digress.

While the steak is grilling, peel a large clove of garlic and cut it in half.  

We eat steak rare, and so remove it from the grill when the internal temperature registers 120-degrees on an instant read thermometer.  With a little experimentation you'll find the temperature that works for you.

Please note that your mileage will inevitably vary from steak to steak. A fattier piece will flare up more, resulting in more char. (And oh, how we can tell you some horror stories).  Marbling affects how fast the meat cooks.  In other words, keep an eye on your steak.

I think we (the collective we) are uncomfortable with the idea that the meat is still cooking while it rests. If you leave it on the grill until it “looks right” it will probably be overdone.  At first I thought this steak was underdone, but it was perfect. Of course, we like our meat bloody. 


I now turn you back over to Long Suffering Wife. . . 
Remove the steak from the grill and immediately rub both sides vigorously with the cut sides of the garlic.  Tent steak with foil and REST FOR 10 MINUTES. Yes, I shouted that.
Remove foil.  If your steak has a bone, cut around the bone to release the meat.  Nibble delicious nubbins of beef from bone.  Share with your spouse/partner. Slice steak across the grain into approximately ½-inch slices.  Plate what you will be eating.  Embellish with a squirt of fresh lemon juice and a drizzle of extra-virgin olive oil.
 Mangia tutti.

When you approach the tableside with these intimidating monsters and carve them up, your guests will tremble with awe, basking in your magnificence and casual impertinence.
  -- Anthony Bourdain
Sliced Porterhouse with a Simple Salad of 
Heirloom Tomato, Crusty Bread, Fresh Basil, Olive Oil, and Sea Salt 


The last word:  We get three dinners for two out of a large porterhouse steak.  What to do with leftovers? They're excellent cold on a salad with a red wine vinaigrette, or how about the steak tacos of your dreams?


Monday, June 8, 2015

A Summer (Strawberry) Romance

   Hello, gorgeous

There's a line in a song that goes something like "How can I miss you if you don't go away?" After a winter of abstinence, there is heightened pleasure in eating fruits and vegetables just pulled from the ground or plucked from the vine.

Last week I sat in my car at the Day Road farm stand, a flat of Bainbridge Island Farms strawberries on the seat beside me. I picked one up and bit into thick, garnet flesh, shot through with juice impossibly sweet. I ate another, eyes closed, my head resting against the seat. I may have moaned. Just a little.

Heading home, I ate berries one by one, tossing the rough green tops out the sunroof. Hedonistic pleasure, parceled in tiny jewel-toned bites.  

In winter when our farms lie fallow, I cook for comfort with the corn, tomatoes, peppers, blueberries, raspberries, and strawberries tucked in my freezer when at their peak, and wait patiently for this June day.
What to do with this bounty?  
Make a plan before going home.

The shelf life of local berries is less than 24 hours. After eating as many as you can out of the box without making yourself ill, try these recipes to extend the love affair.

As simple as it gets. Three ingredients become more than the sum of their parts with fresh berries, good sour cream (the only ingredients should be cream and enzymes), and dark muscovado sugar. Dip berry in sour cream, dip again in sugar. Eat.  

Of course you're going to make freezer jam. No cooking, no sterilizing jars, no lengthy prep. Buy a box of fruit pectin, such as Sure Jell, a bag of sugar, and a lemon.  (Some recipes call for a tablespoon or two of lemon juice, others don't. Lemon cuts through a bit of the sugar, so I use it.) Follow the directions for freezer jam in the pectin package. Spend 45 minutes washing, hulling, crushing, stirring and scooping jam into jars. With that wee effort comes months of the freshest and best tasting jam on the planet, with plenty left over for much sought-after hostess gifts.

Next up:  Pop Tarts!
Your friends and family will believe you have super powers if you use your homemade strawberry jam in pop tarts. Here's the recipe from Bon Appetit: Strawberry Pop Tarts Make a double batch and freeze them. The recipe says they freeze for up to a week. Balderdash. I've frozen them for a month and they've been perfect. You can cut them in any shape or size. Just don't over fill with jam, and seal the edges well. I used a 2 x 2 ravioli stamp for the pop tarts in the photo above, but I've also used a heart-shaped cookie cutter, or gone free-form with a pastry wheel or knife. With these darlings on hand, you're 30 minutes away from an elegant little dessert any time. 


And now, the moment you've been waiting for: Ice Cream!  
Roasted Strawberry, Balsamic, and Fresh Rosemary Ice Cream 

I first had a version of this ice cream at Salt & Straw in Portland. It was assertive, potent with vinegar.  I liked it, but it wasn't something I'd eat a quart of. I wanted a more nuanced approach. After trying several online versions, I went back to my own ice cream template and tweaked it. The final result is ultra-smooth, with a subtle back note of rosemary and balsamic. Roasting the strawberries gives them a dark, mellow taste.  All grown up like.


Roasted Strawberry Balsamic Rosemary Ice Cream
Yield 1.5 quarts

1 pint strawberries
2 tablespoons granulated sugar
1/8 cup balsamic vinegar    
1 tablespoon vodka, cherry heering, Luxardo cherry liquor, or kirsch (optional, but recommended)

2 cups heavy cream
1/2 cup milk
3/4 cup granulated sugar   
1, 4-inch sprig of fresh rosemary
pinch of sea salt 
3 egg yolks 
1 teaspoon pure vanilla extract

Preheat oven to 425°. Rinse and hull strawberries. Place them on a baking sheet lined with foil. Sprinkle with 2 tablespoons of sugar and balsamic vinegar and macerate for about 15 minutes. Roast in oven for 10-15 minutes until soft, but not mushy.

Cool, then transfer berries and accumulated syrup, along with 1 tablespoon liquor (if using) to a bowl, cover and refrigerate.  

Whisk egg yolks in a bowl until frothy. Combine cream, milk, sugar, salt and rosemary sprig in heavy saucepan. Heat cream mixture over medium heat on the stove until temperature reaches 170° on an instant-read digital thermometer. Slowly drizzle the warm cream mixture into the eggs, whisking constantly. Return egg and cream mixture to the pan and cook over medium heat, whisking constantly, until mixture reaches 180°. Do not let the mixture boil or you'll get sweet scrambled eggs.  Yuck.

Remove and discard rosemary sprig. Strain custard through a mesh sieve into a 4-cup glass Pyrek measuring cup, or a bowl. Whisk in vanilla extract.  Cover and refrigerate for at least four hours or overnight.

Use an immersion blender, or a stand blender and puree strawberry mixture. Pour strawberry mixture and custard into ice cream maker and process according to manufacturer’s directions. Transfer ice cream to glass, plastic, or paper container, cover tightly and freeze until firm.
Ice Cream Base and Roasted Strawberries

Ice cream is incredibly simple to make, and the results are so good. When you're not up to making your own, try the ice cream at Mora, Molly Moon, or Salt & Straw. They use excellent ingredients and don't add junk found in even premium grocery store ice cream. Read the labels.  

All that cooking has made me thirsty. Time to cool off with a fresh strawberry cocktail.
Here's a dangerously good recipe from Imbibe Magazine:  Kentucky Daiquiri.

One bit of advice when buying strawberries. While berries are in season, the Day Road farm stand is open every day at 9:00am, BUT they don't pick every day and berries sell out fast. Be in line at 8:50am. Trust me, it's worth it if you have to try more than once to score your own flat.